Natural cosmetics are gaining increasing popularity due to the numerous benefits they offer. One of the simplest examples of an organic cosmetic that no bathroom should be without is a bar of soap. Did you know you can easily make it in the comfort of your own home? Discover how to make your own homemade bar soap and how to store it.
Why Make Your Own Bar Soap?
Eco-friendly, natural, free from artificial colourants and preservatives, bar soaps are a real hit among natural cosmetics, enjoying immense popularity for several years now. Unfortunately, the biggest drawback of ecological soaps is their price, which is why more and more people are deciding to make soap themselves. A good recipe, the right ingredients, and a bit of spare time are all you need to create a unique and one-of-a-kind, wonderfully fragrant and beautiful soap. Why is it worth making it in the comfort of your own home?
- Homemade soap is a high-quality cosmetic that does not contain irritating or harmful substances for the skin.
- It allows for the independent selection of ingredients – natural soap can look, smell, and possess the skincare properties you desire.
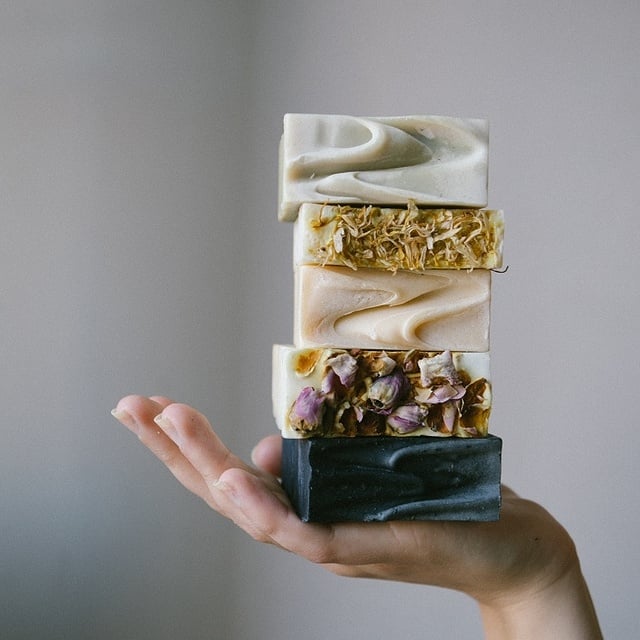
- Homemade organic soap makes for a phenomenal and unique bathroom decoration.
- Producing a homemade bar costs significantly less than buying soap from a natural cosmetics shop.
- Preparing the product yourself is great fun for the whole family.
- Homemade soaps make an excellent gift for loved ones. Colourful, wonderfully scented soaps are sure to bring much joy to those who receive them.
- Making it at home is a solution beneficial for the environment, as you will no longer be polluting it with plastic packaging.


A Quick and Easy Way to Make Homemade Soap
There are several ways to prepare homemade soap. One of the simplest and quickest methods involves making soap from a ready-made base.
Grey soap, children's soaps, pieces of old soaps, soap flakes, and natural white soap all work perfectly as a base. Furthermore, the market offers a wide selection of ready-made soap bases. These come in the form of shavings, granules, or a block that needs to be grated by hand. You can buy a basic base or one with additives, e.g., precious oils, white, transparent, or already coloured. The choice is yours!
Once you've chosen the right base, you can start making your soap. First, the base needs to be grated, mixed with water, freshly squeezed vegetable or fruit juice, milk, or an infusion in a ratio of roughly 0.5-1 cup of liquid to 200g of base.
You should know that adding more water will make the soap take longer to dry, but it will melt faster when washing hands. It's also worth noting that ready-made soap bases do not require any additional liquid. They melt perfectly on their own after being divided into smaller pieces. The resulting mixture is dissolved in a bain-marie, i.e., a pot with hot water is placed under a bowl containing the base and liquid, taking care not to let the mixture boil.


Now it's time for the most enjoyable stage of preparing homemade soap: the additives that will give the natural creation excellent skincare properties, and also make it smell wonderful, have a beautiful colour and shape.
First, to the dissolved mass, you should add oils in a ratio of 2.5-3 tablespoons per 200g of soap mass, preferably those with moisturising, regenerating, or protective properties, such as macadamia oil, argan oil, almond oil, or Shea butter. Glycerine, honey, or beeswax are also excellent additions.
You can also make exfoliating soap at home. Simply add ground coffee, cinnamon, poppy seeds, fruit peels, oat flakes or bran, dried flower petals and herb leaves, as well as various types of clay or coarse salt, such as Himalayan or Dead Sea salt, to the base.
Now it's time to make our soap smell divine. Here, the choice is also vast, and everything truly depends on your taste. To give your homemade cosmetic a beautiful scent, it's worth adding an essential oil suitable for skin contact to the soap base, such as lavender, violet, jasmine, chamomile, citrus, aloe vera, or Damask rose oil. You can also add infusions and oily macerates of flowers and herbs to the base.
It's high time to colour the soap. There are two ways. You can buy special soap dyes or colour your homemade cosmetic with one of the ingredients you intend to add anyway to achieve a soap with specific skincare properties.
What ingredients to add to soap to get a homemade cosmetic of a specific colour?
- Yellow-orange soap – carrot oil macerate, turmeric, red clay;
- Light blue soap – fresh blueberry juice, blue clay;
- Green soap – parsley or spinach juice, young barley oil macerate, green clay;
- Purple soap – beetroot juice;
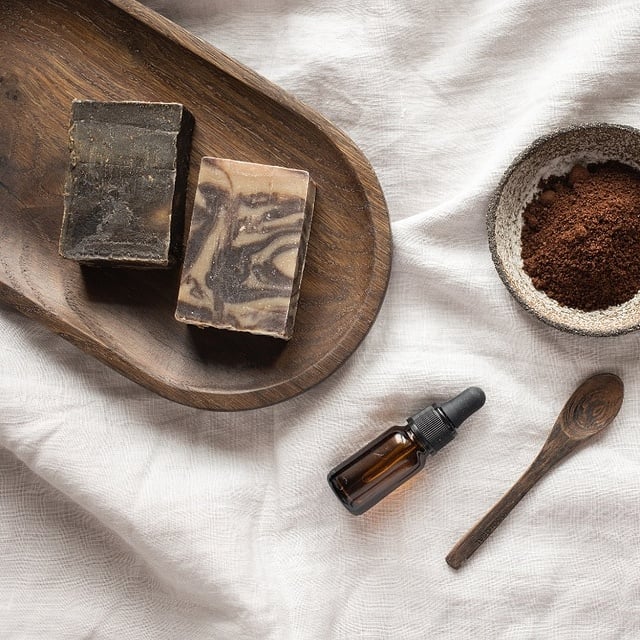
- Brown soap – brewed coffee, cocoa, cinnamon;
- Black soap – activated charcoal.
However, you don't have to limit yourself to one colour, especially as marbled soaps are captivating in their appearance and will certainly make an unconventional bathroom decoration. How to make them? Simply divide the soap base in half and colour each half a different colour. Then, just layer the mass alternately into the mould, and finally, gently swirl the top – and voilà!
Did you know that your soap is almost ready? Now, all you have to do is pour it into your chosen mould – silicone baking moulds work perfectly, from which you can easily remove the finished soap, as do ice cube trays. Spray the top of the poured soap mass in the mould with alcohol to get rid of foam bubbles, and then wait for it to set (this will take about 2 hours).


The final step is drying the soap. Once solidified, remove the soap from the moulds, cut it into smaller pieces if needed, then place it on a rack, cover it with parchment paper, put it in a well-ventilated spot, and arm yourself with patience. After about 2 weeks, your soaps will be ready.
Below we provide a detailed recipe for glycerine soaps: lavender and rosemary-lemon, which can be made according to the procedure described above.
Ingredients for lavender glycerine soap:
- 440g white glycerine soap base
- 40 drops of lavender essential oil
- 15 drops of purple dye
- Dried lavender flowers
Ingredients for rosemary-lemon soap:
- 500g transparent glycerine soap base
- 45 drops of lemongrass oil
- 2 teaspoons of freshly grated lemon zest
- 2 teaspoons of rosemary
Tip
How to Make Soap Using the Cold Process Method?
Another way to make your own soap is the cold process method, which means that the reaction of fats and lye takes place at a low temperature, ranging from 28-45 degrees Celsius. This ensures that the valuable skincare properties of the oils contained in the soap are preserved. This method is quite simple, yet time-consuming, but allows for the independent preparation of soap from scratch, without the need for a ready-made base. Discover the recipe for cold process soap with added Shea butter.
Ingredients:
- 100g sodium hydroxide, also known as caustic soda
- 250g distilled water
- 147g Shea butter
- 131g coconut oil
- 280g olive oil
- 186g palm oil
Preparation:
- First, prepare the water-lye phase. In separate bowls, measure the exact amount of water and sodium hydroxide on a kitchen scale. Then, slowly and carefully pour the sodium hydroxide into a glass or stainless steel container with water. Remember to always add hydroxide to water, never the other way around! Be very cautious, as sodium hydroxide is a highly corrosive compound. Stir the mixture with a wooden spoon. After the soda dissolves, the temperature of the entire mixture will rise to about 70 degrees Celsius. Using a kitchen thermometer, you should monitor the temperature, as the water-lye mixture should cool to about 45 degrees Celsius.
- Prepare the oil phase. Add coconut oil, palm oil, olive oil, and Shea butter to a stainless steel pot. Place the pot in a larger bowl or pot of hot water and stir the fats until they are completely dissolved. The fats should also reach a temperature of 45 degrees Celsius.
- Now it's time to combine the water-lye phase with the oil phase. Both phases must have a similar temperature, hovering around 45 degrees Celsius. Stir the oil phase and slowly, in a thin stream, pour in the water-lye phase. Mix both phases with a wooden spoon until they are fully combined.
- Next, the mass should be blended with a blender with a plastic or stainless steel attachment. Blend the mixture with a pulsing motion until it becomes thick and much lighter (this will take about 7-10 minutes), which will indicate that the saponification process has begun.
- When the mixture reaches a pudding-like consistency, it's a sign that it's ready. At this stage, you can add additional ingredients, such as coffee, cocoa, oat flakes, essential oils, or clays.
- Pour the mixture into one large or several small moulds, cover with paper, and leave in a warm place for 24 hours. After this time, remove the soap from the moulds, cut into smaller bars if necessary, then transfer to a wooden or plastic tray. The soap must now cure. After about 4-6 weeks, it should be ready. However, the longer it cures, the harder, more durable, and gentler on the skin it will become.


How to Store Bar Soap? A Good Soap Dish is Key!
The guarantee of durability and freshness for homemade bar soap lies in its proper storage. First and foremost, natural soap should be protected from unnecessary contact with water, which will keep the bar firm and ensure it lasts a long time. Meanwhile, unused bar soap should be stored in a dark and cool place.
The choice of an appropriate soap dish also plays a crucial role. The best choice is a soap dish with special nubs or drainage channels that prevent water from collecting at the bottom of the dish, ensuring the soap doesn't dissolve. Moreover, a soap dish with a drainer makes it easier to keep your basin tidy. Thanks to this solution, you don't have to worry about unsightly streaks or soap stains on your basin.
Which soap dish to choose? You have the option of freestanding soap dishes, which you simply place anywhere on your basin or bath, and wall-mounted soap dishes. Furthermore, soap dishes also differ in their material. Models made from ceramic are very popular, being incredibly stylish and easy to clean, although you do have to handle them quite carefully, as they can crack and chip under a strong impact. Steel soap dishes are also worth noting, characterised by high durability and resistance to various mechanical damage, so you can be sure they will serve you for a long time. We mustn't forget about soap dishes made from plastics, such as rubber or silicone, which come in various shapes and colours, and are also easy to wash and resistant to different temperatures.
Aside from practical considerations, it's also worth paying attention to the appearance of the soap dish, which should match the style of your bathroom decor and impress with its aesthetic and designer look. Just choose the right decorative motif and colour to enjoy a stylish yet functional ornament for your bathroom.


As you can see, making your own soap at home is nothing difficult. All it takes is a good recipe, a few ingredients, and a bit of patience to enjoy the scent, skincare properties, and beautiful appearance of your self-made, fully natural and ecological soap. Alongside other natural cosmetics, a wide selection of which you'll find in the wellness category, homemade soap will certainly look perfect in your bathroom.